Maker Journal
From Ender 3 to Bambu Lab P2S: The 3D Printer Upgrade My Classroom (and Shop) Needed
After a decade of 3D printing, from a MakerBot Replicator+ to Creality, I upgraded to a Bambu Lab P2S with AMS2. Here's what changed and why it matters for makers and makerspace teachers.
Disclosure: Some links in this post are Amazon affiliate links. If you buy through them, I may earn a small commission at no extra cost to you. I only link to things I actually own and use — everything here is gear that lives in my classroom or shop.
I’ve been 3D printing for over a decade, starting with a MakerBot Replicator+ and working through budget machines, off-brand printers, a few years of Ender 3 frustration, and a Prusa Mini that lives in my K-6 classroom makerspace. Then a Bambu Lab P2S with AMS2 showed up on Facebook Marketplace at a price I couldn’t walk away from — and after the first few prints, I don’t think I’m going back.
What This Is
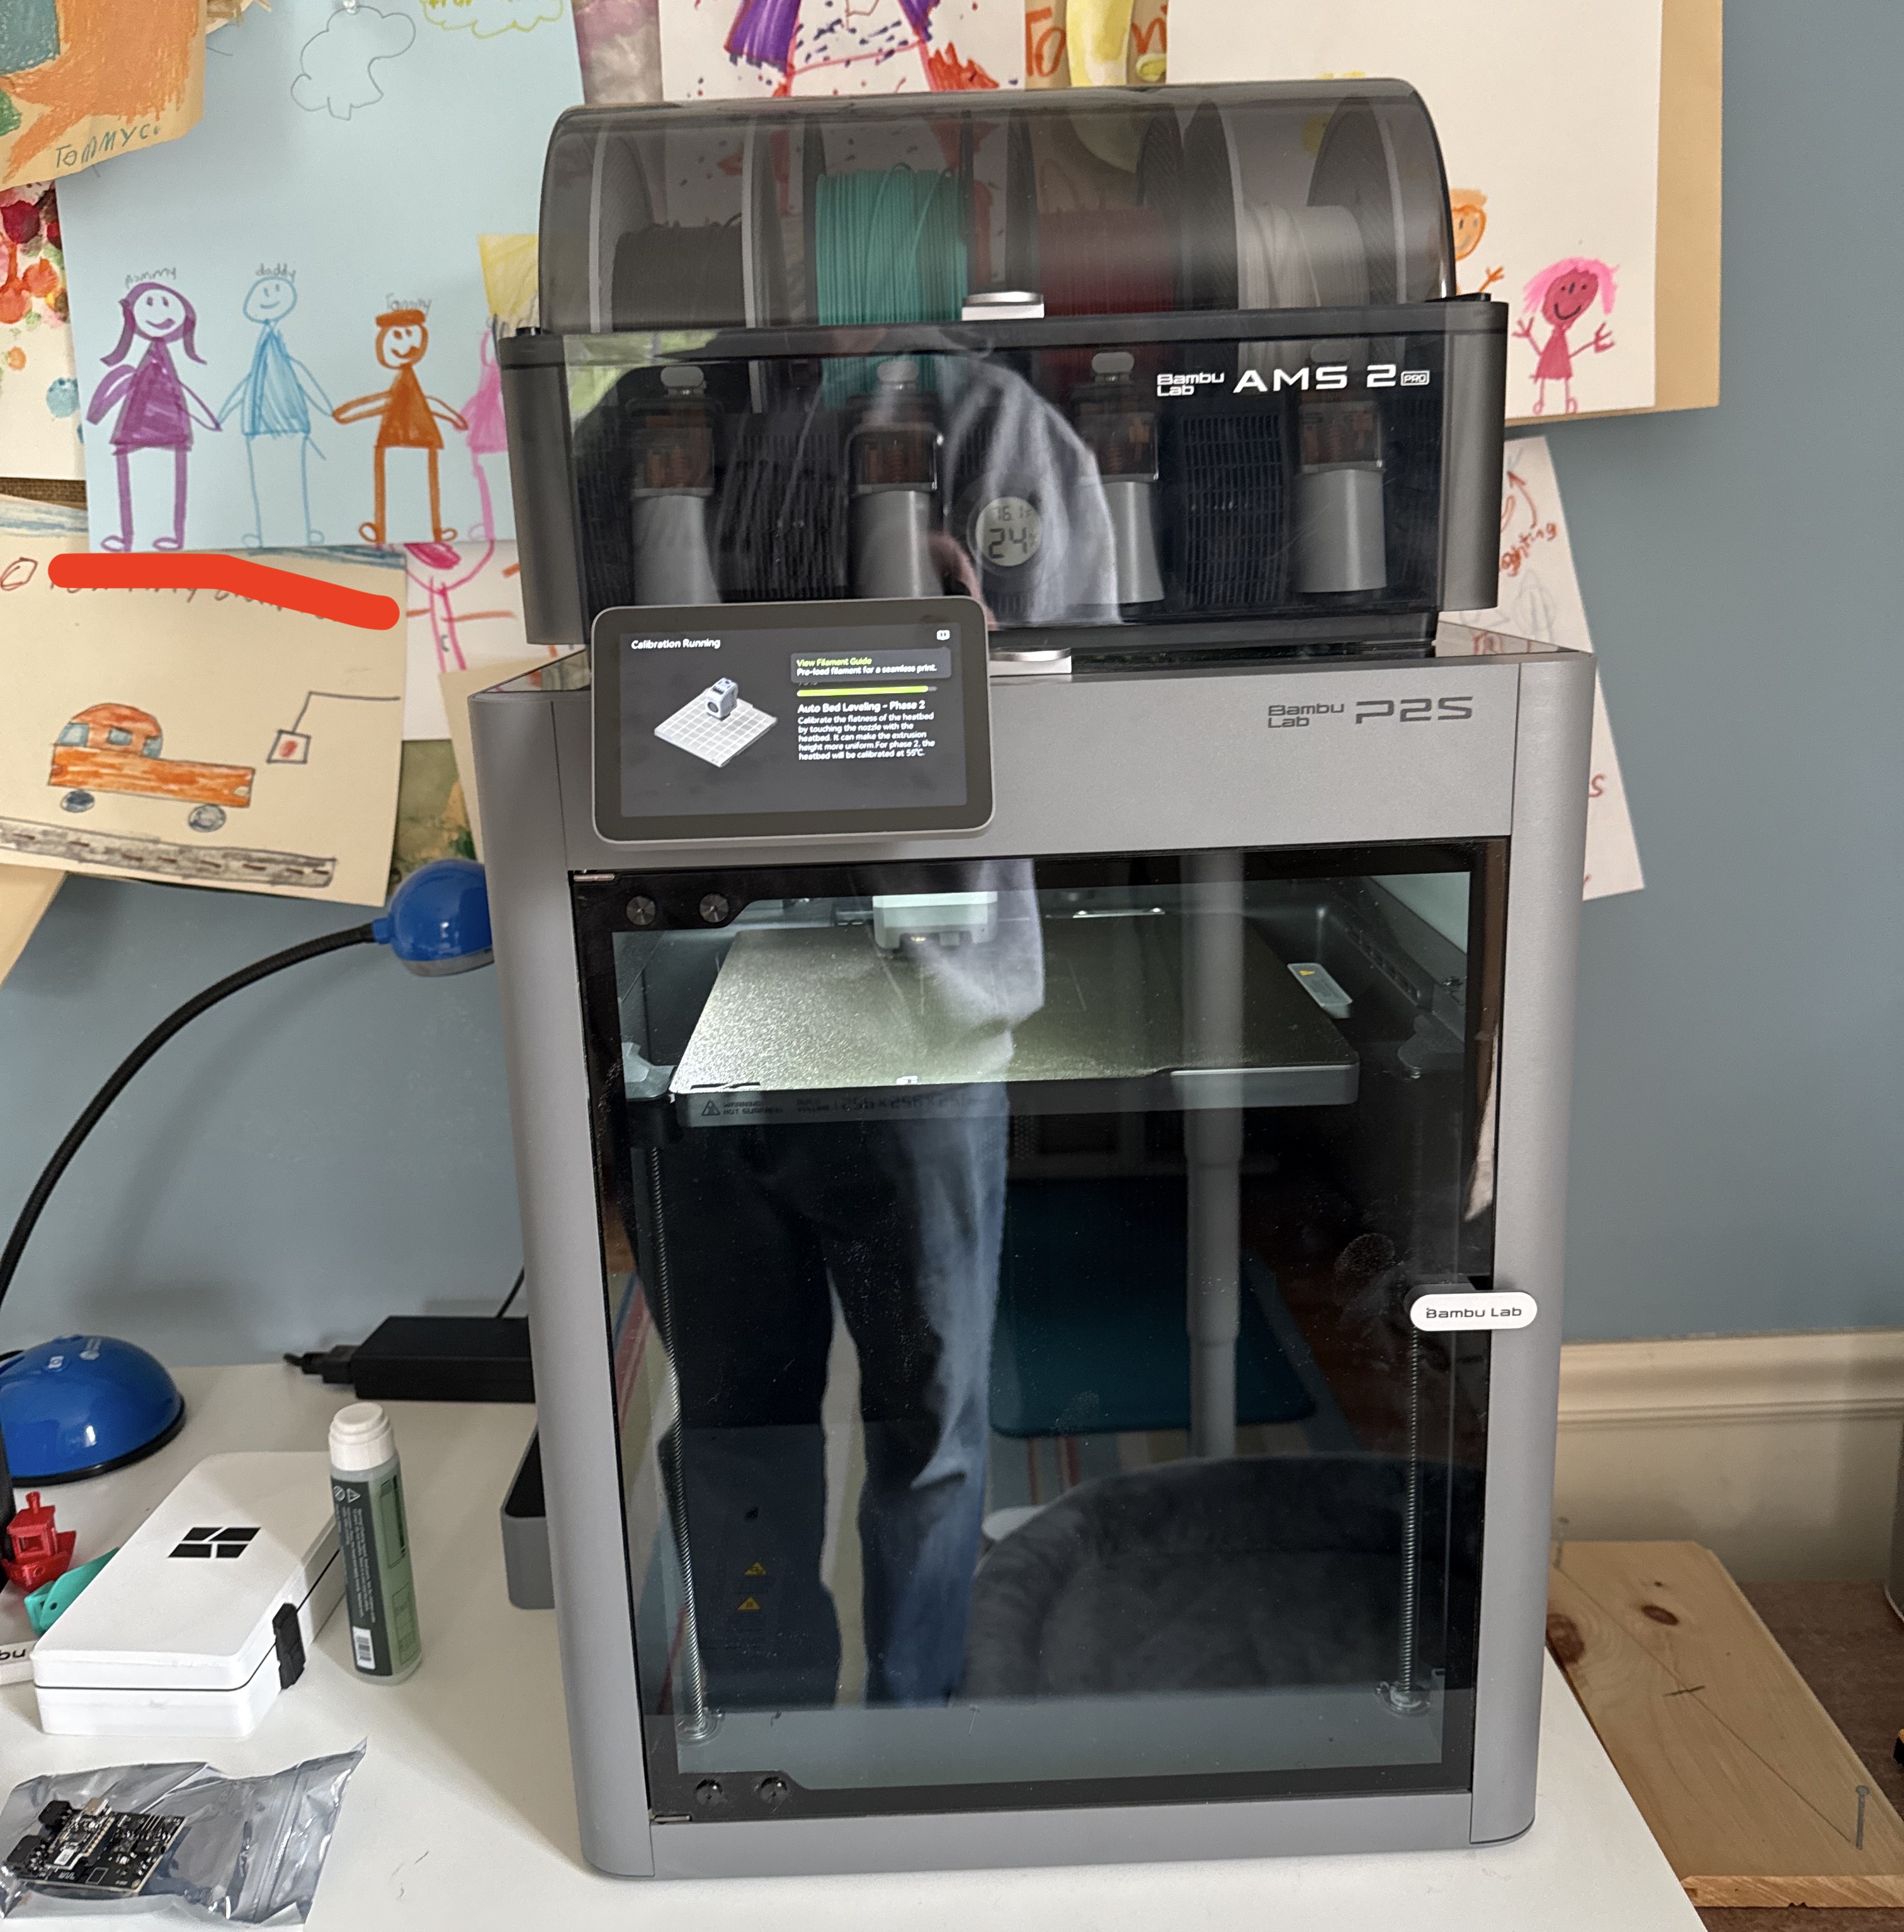
The Bambu Lab P2S is a fully enclosed, fast CoreXY FDM printer aimed squarely at makers who want reliable, high-quality prints without turning printer calibration into a second hobby. Mine came with the AMS2 — the Automatic Material System that holds up to 4 rolls of filament and handles automatic spool switching mid-print. There’s also an external spool port on the side if you need a fifth roll in a pinch, which is a nice failsafe for very long jobs.
I’m running it primarily with eSUN PLA+ 1.75mm and Hatchbox PLA loaded in the AMS2, which covers the vast majority of what I need for classroom projects and shop parts. For Bambu-optimized results with zero profile fiddling, Bambu Lab’s own PLA Basic is worth keeping a few rolls on hand.
The P2S ships with a magnetic textured PEI build plate — I picked up a spare Bambu textured PEI plate so I can swap plates mid-session in class without waiting for the bed to cool down.
Why It Matters
Let me put the pricing in perspective first, because it’s genuinely remarkable. When I first got my hands on a MakerBot Replicator+, that machine retailed for well over $2,000 — and it was considered a prosumer workhorse at the time. It still needed careful management, still failed unexpectedly, and had none of the automation features that come standard on the P2S today. The 3D printing industry has done something rare: dramatically improved capability while dropping price, and the P2S is the clearest example of that arc I’ve personally witnessed.
Beyond the value story, there are three reasons this upgrade matters specifically:
1. Reliability in a classroom setting. I’m a K-6 technology teacher. When I start a print before first period, I need it to still be running correctly at lunch. Open-frame printers — the Ender 3 included — require a level of attention that doesn’t fit into a teaching schedule. The P2S handles automatic calibration, vibration compensation, and flow detection — the things that used to send me down hour-long debugging rabbit holes at the worst possible times.
2. Air quality in shared spaces. Heated PLA releases ultrafine particles and volatile organic compounds (VOCs). In a small classroom with 20 kids, that’s not something I want to ignore. Open-frame printers like the Ender 3 and Prusa Mini offer zero enclosure and zero filtration. The P2S has a fully enclosed chamber with a built-in HEPA + activated carbon filtration system. That’s a real, defensible answer to the health and safety question — which matters to me personally, and matters when making the case to school administration.
3. The AMS2 takes the stress out of long prints. Having 4 rolls loaded means a big overnight project doesn’t fail at 2 AM because a spool ran out. The machine pulls from the next roll and keeps going. And for those extra-long jobs, the external spool port gives you a fifth option without any special setup.
What Worked
- Setup was genuinely fast. First print happened within about 15 minutes of unboxing. The auto bed leveling and calibration routines ran themselves — no manual tramming, no Z-offset tweaking.
- Bambu Studio is the best slicer experience I’ve had. Built on PrusaSlicer’s foundation but significantly cleaner. Good defaults, fast slicing, cloud print support. A student can go from model file to print queue in a few minutes.
- Print quality out of the box was excellent. Custom shop storage bins, classroom manipulatives, and a few items from my kids’ list — all came off the plate cleanly on the first try. Every single one.
- The AMS2 just works. Loaded 4 rolls, ran a few multi-hour prints, zero feed issues. Stick with consistent-diameter filaments like Hatchbox or eSUN PLA+ and you’ll have very few complaints.
- The enclosure opens up material options later. Even if you’re a PLA-only person right now (I mostly am), having the enclosure means ABS, ASA, and PA are on the table whenever you need them — without retrofitting anything.
On filament storage: Moisture ruins prints and causes AMS feed issues. I keep unused spools in vacuum-sealed storage bags with silica gel desiccant packs. For rolls I’m actively cycling through, a SUNLU filament dryer keeps things consistent. It’s cheap insurance.
For cleanup and finishing: a good pair of flush cutters and a deburring tool set make the difference between a print that looks rough and one that looks intentional. Both live on my makerspace cart permanently.
What I Would Change Next Time
- I’d ask for a print video before buying used. The machine was in great shape, but secondhand is always a small gamble. A 30-second video of a running print tells you a lot.
- I underestimated how much filament I’d burn through quickly. Having the AMS2 loaded makes it very easy to just… print a lot. Buying PLA in multi-packs saves real money over individual rolls, especially in a classroom setting.
- I wish I’d ordered the spare build plate on day one. Waiting for the plate to cool between classes is the main friction point in a busy makerspace schedule. The spare-plate swap workflow is much smoother.
- I would have paid more attention to the external spool port earlier. Knowing that fifth slot exists from the start would have saved some mental math on job planning for longer prints.
Try It Yourself
If you’re running a makerspace on an open-frame printer and you’re spending more time fixing it than teaching with it — start by looking at what the P2S costs new today versus what you’d have expected to pay for an enclosed, feature-rich machine five years ago. The gap is striking. Check Facebook Marketplace and local selling groups too; these machines show up used, and in my experience the ones circulating locally have been well-maintained.
If you’re making a case to school administration for an upgrade, lead with the enclosed chamber and air filtration. It’s the clearest differentiator from budget open-frame machines, and it’s a legitimate health and safety argument — not just a spec sheet checkbox.
And if you’re already running a Bambu Lab machine, or you’re mid-research on one, drop a comment below. Happy to talk through what’s working in a K-6 makerspace setup.
All affiliate-linked products above are things I bought myself and use regularly in my classroom or home shop.