Maker Journal
MillMage Bit Library: Why Teaching LightBurn First Speeds Up CNC Lessons
Planning to teach MillMage in a school woodshop after LightBurn? Here is why same-developer software shortens lessons, plus a free tool to build your MillMage bit library.
In my Tech Ed class, students already learn LightBurn for the laser cutter. Our woodshop also has an older CNC router, and we want students using it. When I heard LightBurn’s developers had made CNC router software called MillMage, the choice felt easy. If students already know how LightBurn thinks, they should have a head start on MillMage.
I am planning to start teaching it in the second trimester. Before I put it in front of students, I wanted to learn it myself, and I wanted to learn it faster than they do. So I installed MillMage at home and ran it on my Onefinity CNC. This post covers why I think same-developer software is a good teaching strategy, the first problem I hit, and the free tool I built to solve it.
Why teach software from the same developer?
Every new program asks students to learn two things at once: the software, and the job the software does. A student opening a CNC program for the first time has to figure out where things are, what the words mean, and what a toolpath even is. That is a lot to carry at once.
When two programs come from the same developers, the first part gets much smaller. Here is what I expect to carry over from LightBurn to MillMage:
- Layout and navigation. Students already know how to import artwork, move and scale shapes, and find the settings panels. They are not hunting for the basics.
- The workflow. Design, set the job up, preview it, then send it to the machine. Students who have run the laser already know that rhythm.
- Vocabulary and habits. Ideas like layers, previewing before running, and saving a project file become familiar before the CNC adds new ones.
- Confidence. A student who has already succeeded with one program tends to approach the next one with less fear of clicking the wrong thing.
That leaves more class time for what is actually new. A router is not a laser. Students still have to learn about bits, feeds and speeds, workholding, tabs, and keeping their hands clear of a spinning cutter. I would rather spend a lesson on those than on where the Open button is.
I should be honest that I have not taught MillMage to a class yet. This is my plan and my reasoning, and I will report back after the second trimester starts. If you teach with LightBurn already, I think it is a strong reason to look at MillMage for your router.
Learning it myself first
I teach better when I have made the mistakes before the students do. Running MillMage on my Onefinity at home lets me find the rough spots, write the instructions, and know what to say when a student asks “why is it doing that?”
It is also a good way to check my own assumptions. The skills that transfer in my head need to transfer for a real seventh grader in a real class period, and I will only know once they try it.
The first hurdle: an empty bit library
The biggest hurdle was small and annoying. MillMage’s bit library did not exist yet when I started. A CNC program needs to know about your cutters, including diameter, flutes, and a starting feed rate, plunge rate, and spindle speed. Without a library, you enter every bit by hand, one field at a time.
I own a lot of bits. Typing in each one would take a long time, and it would be easy to make a typo in a feed rate. At school it gets worse. Every new bit we buy would need the same treatment, and students could mistype values on a real machine.
So I built Bit Library Builder, a free web tool that creates a MillMage .tools file for you.
What Bit Library Builder does
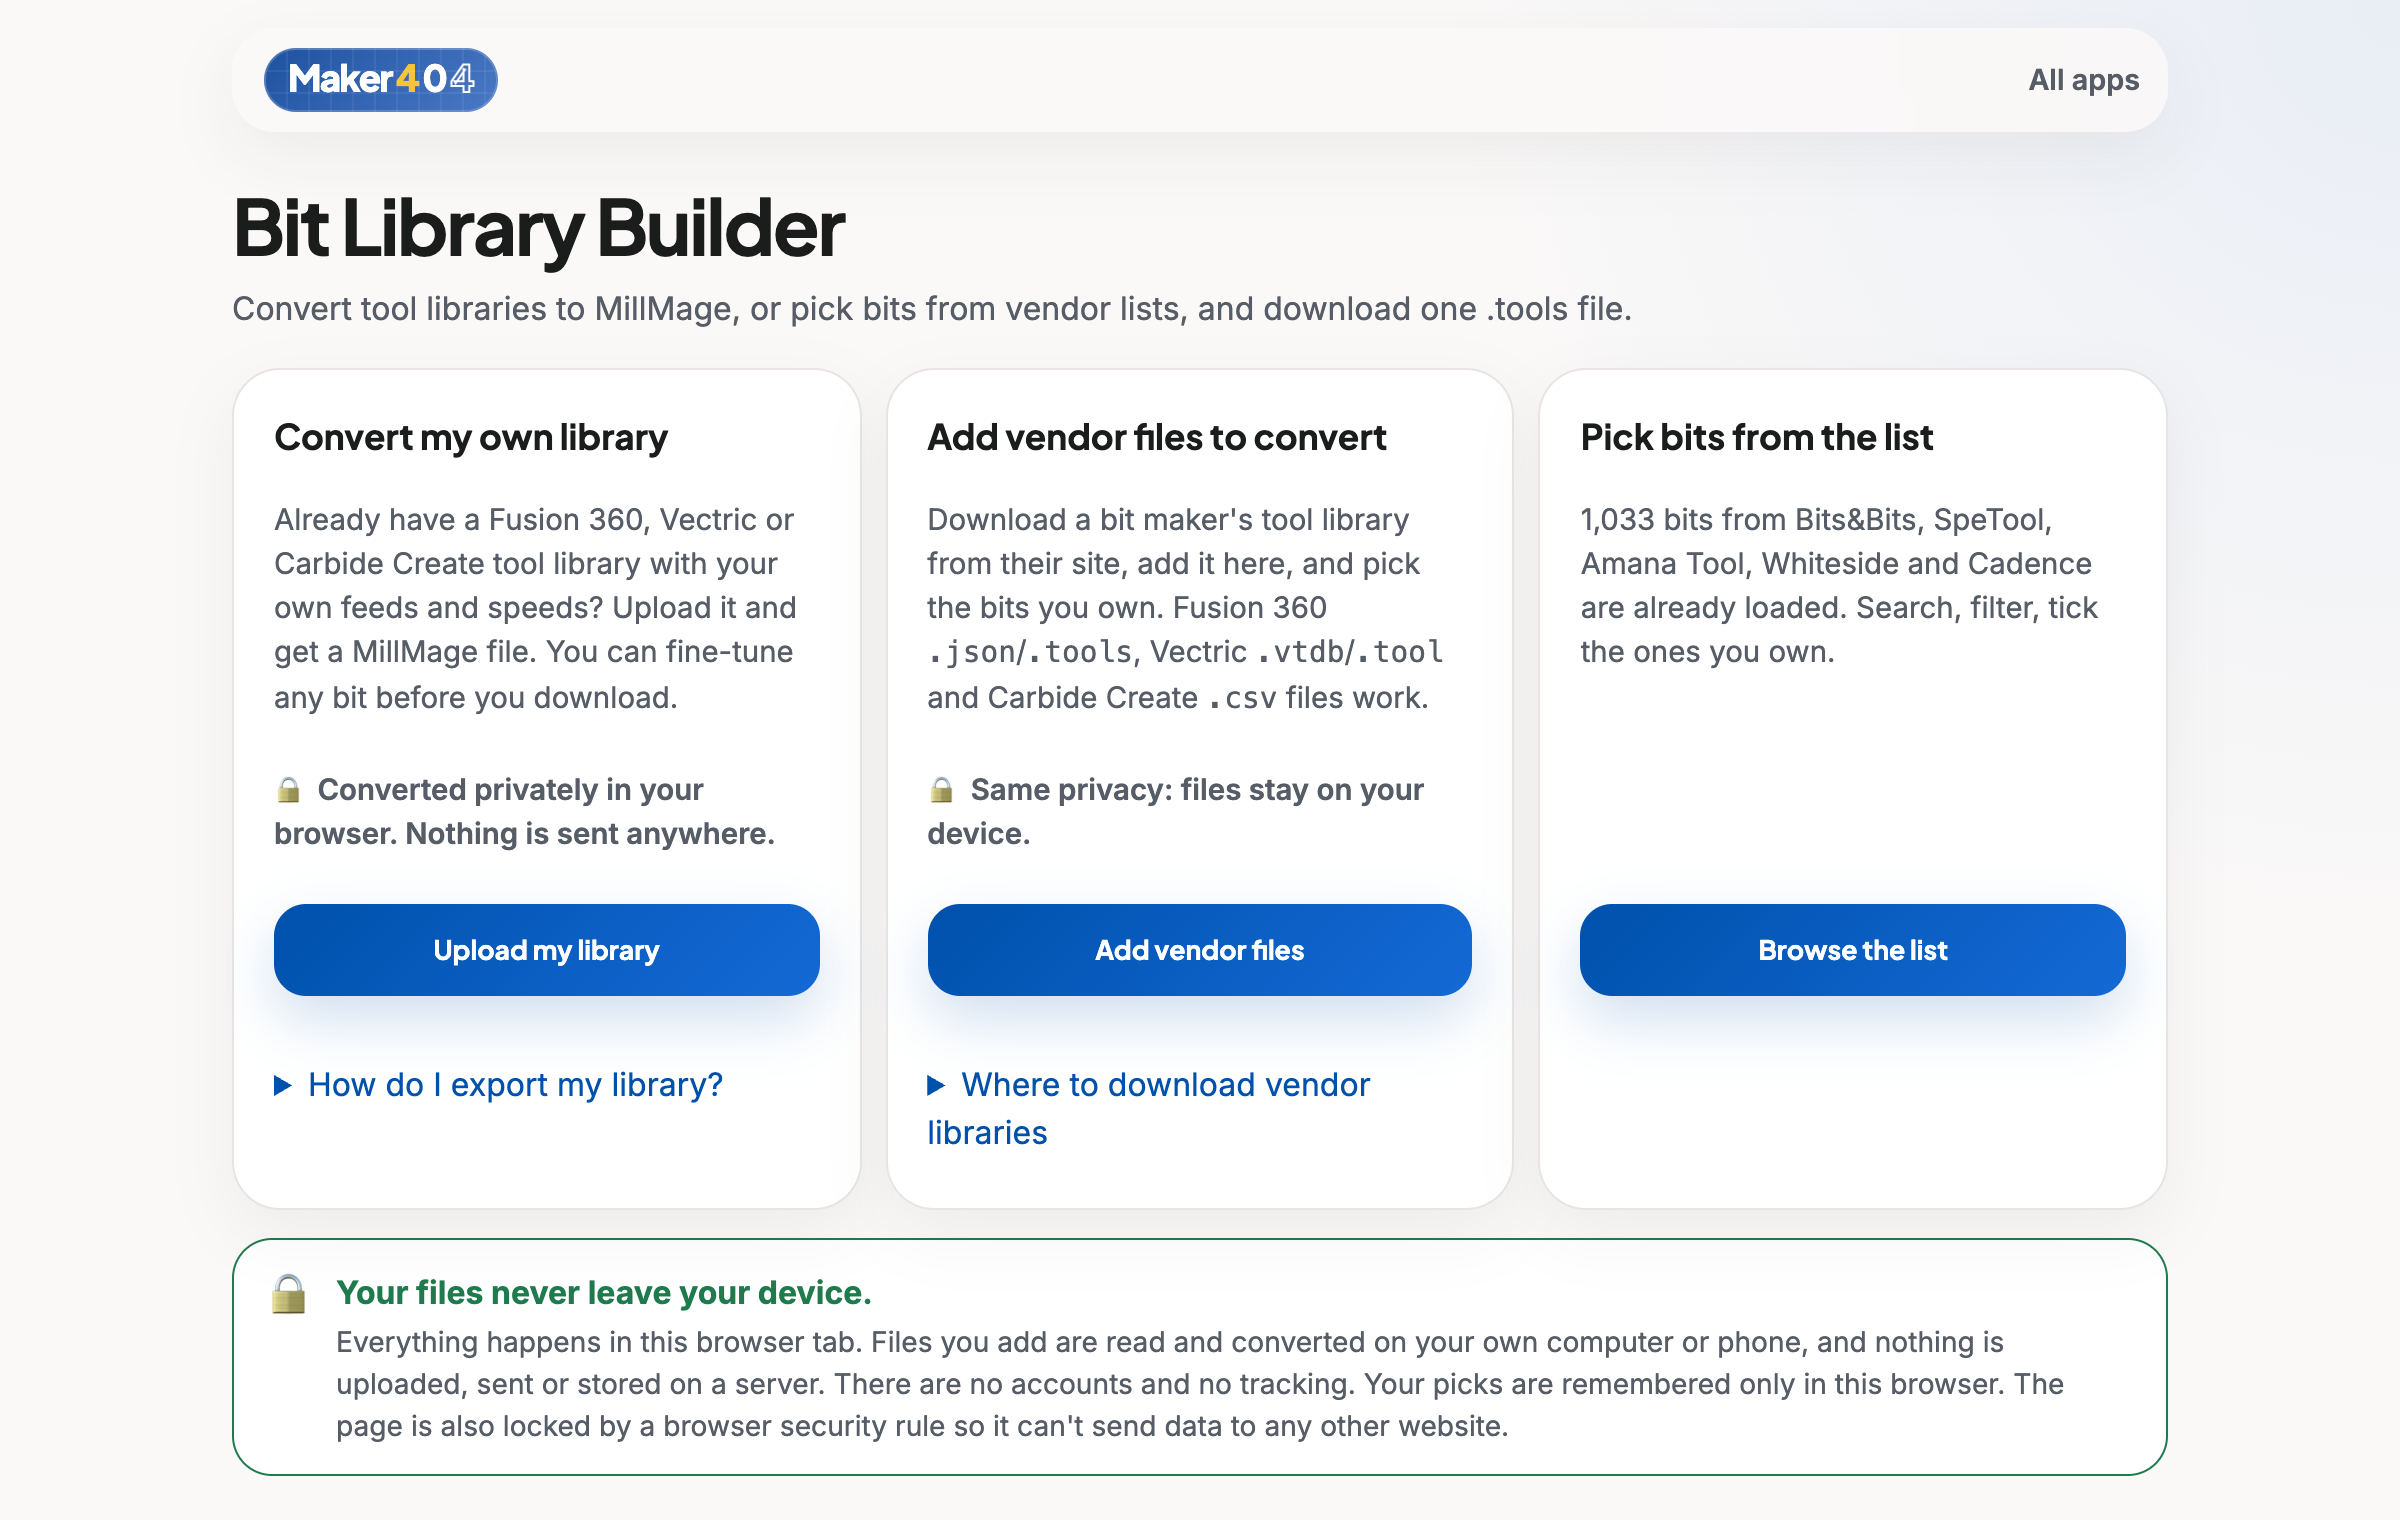
The start screen gives you three ways in:
- Convert my own library. If you already have a tool library in Fusion 360, Vectric, or Carbide Create with your own feeds and speeds, upload it and get a MillMage file back. You can fine-tune any bit before you download.
- Add vendor files. Download a bit maker’s own tool library, add it to the tool, and pick the bits you own. It reads Fusion 360
.jsonand.toolsfiles, Vectric.vtdband.toolfiles, and Carbide Create.csvfiles. - Pick bits from the list. More than 1,000 bits from Bits&Bits, SpeTool, Amana Tool, Whiteside, and Cadence are already loaded. You search, filter, and tick the ones you own.
Search and filter
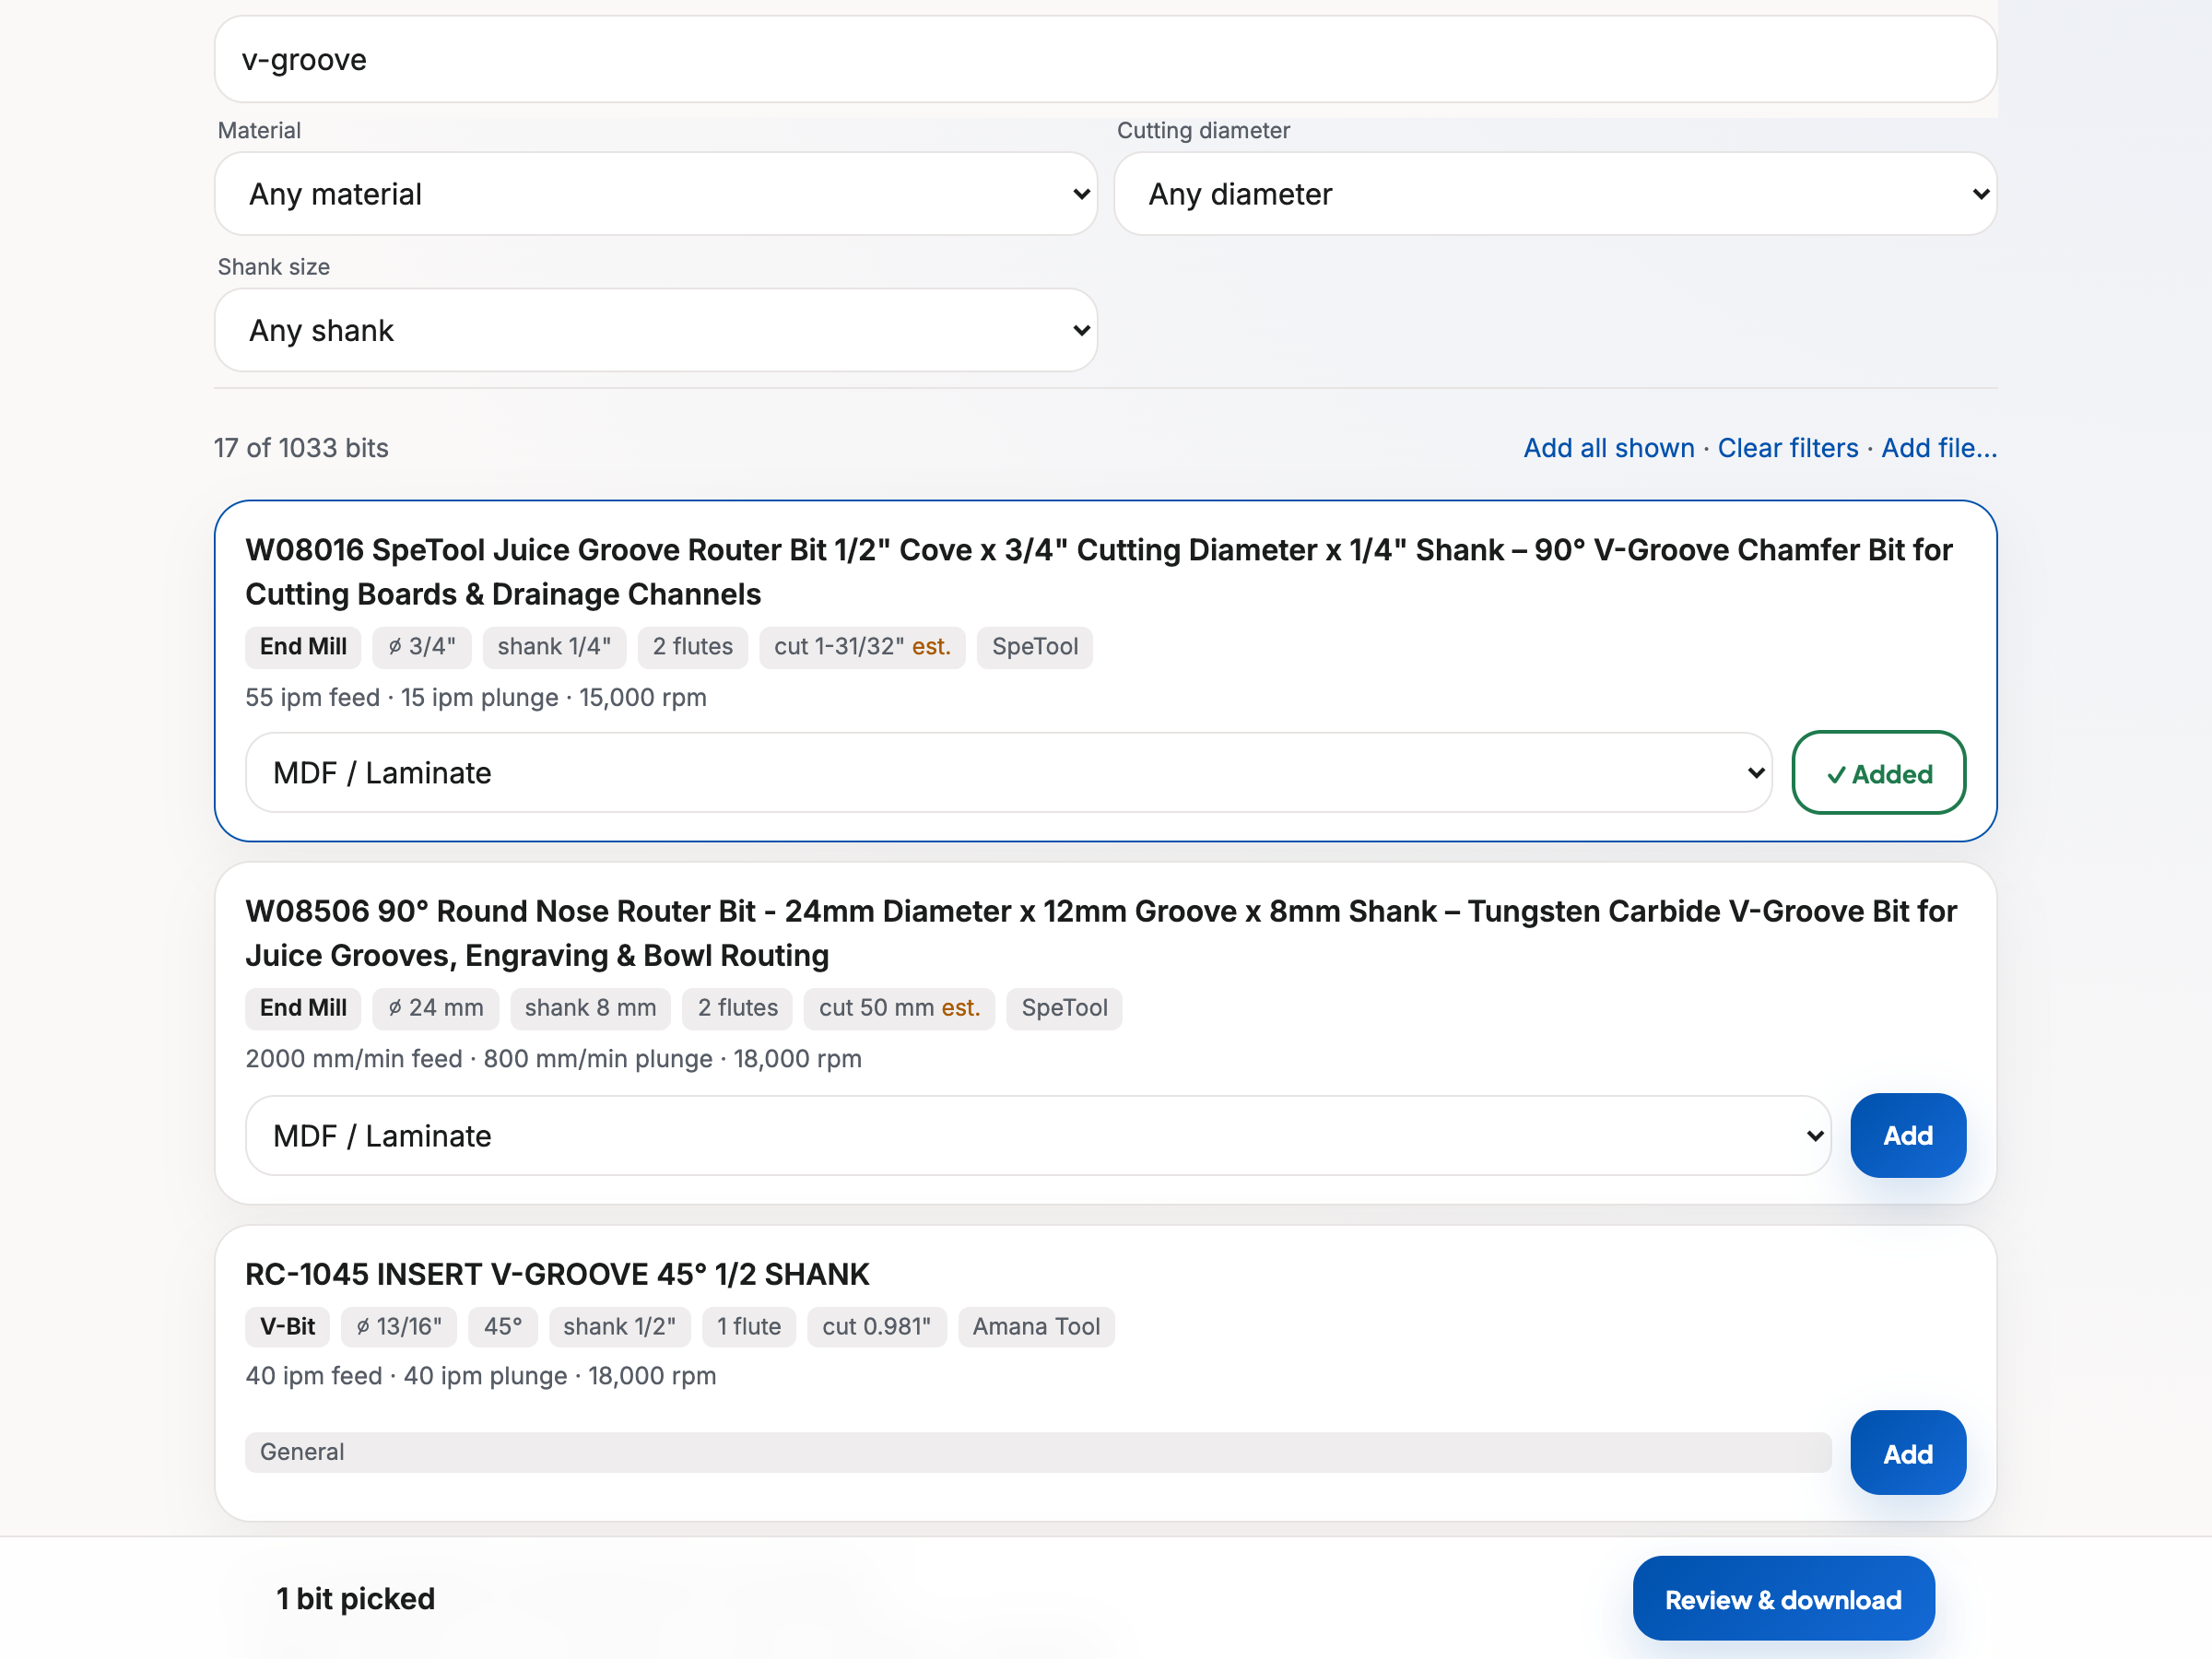
Each bit shows its type, diameter, shank size, flute count, cutting length, vendor, and the vendor’s suggested feed, plunge, and RPM. You can filter by bit type (end mill, ball mill, V-bit, tapered, and more), by vendor, by material, by cutting diameter, and by shank size. Search understands things like “1/4 down spiral” or a part number.
Some cutting lengths are marked est., which means the vendor did not list one and the tool estimated it. I would check those against the bit in your hand.
Review and edit before you download
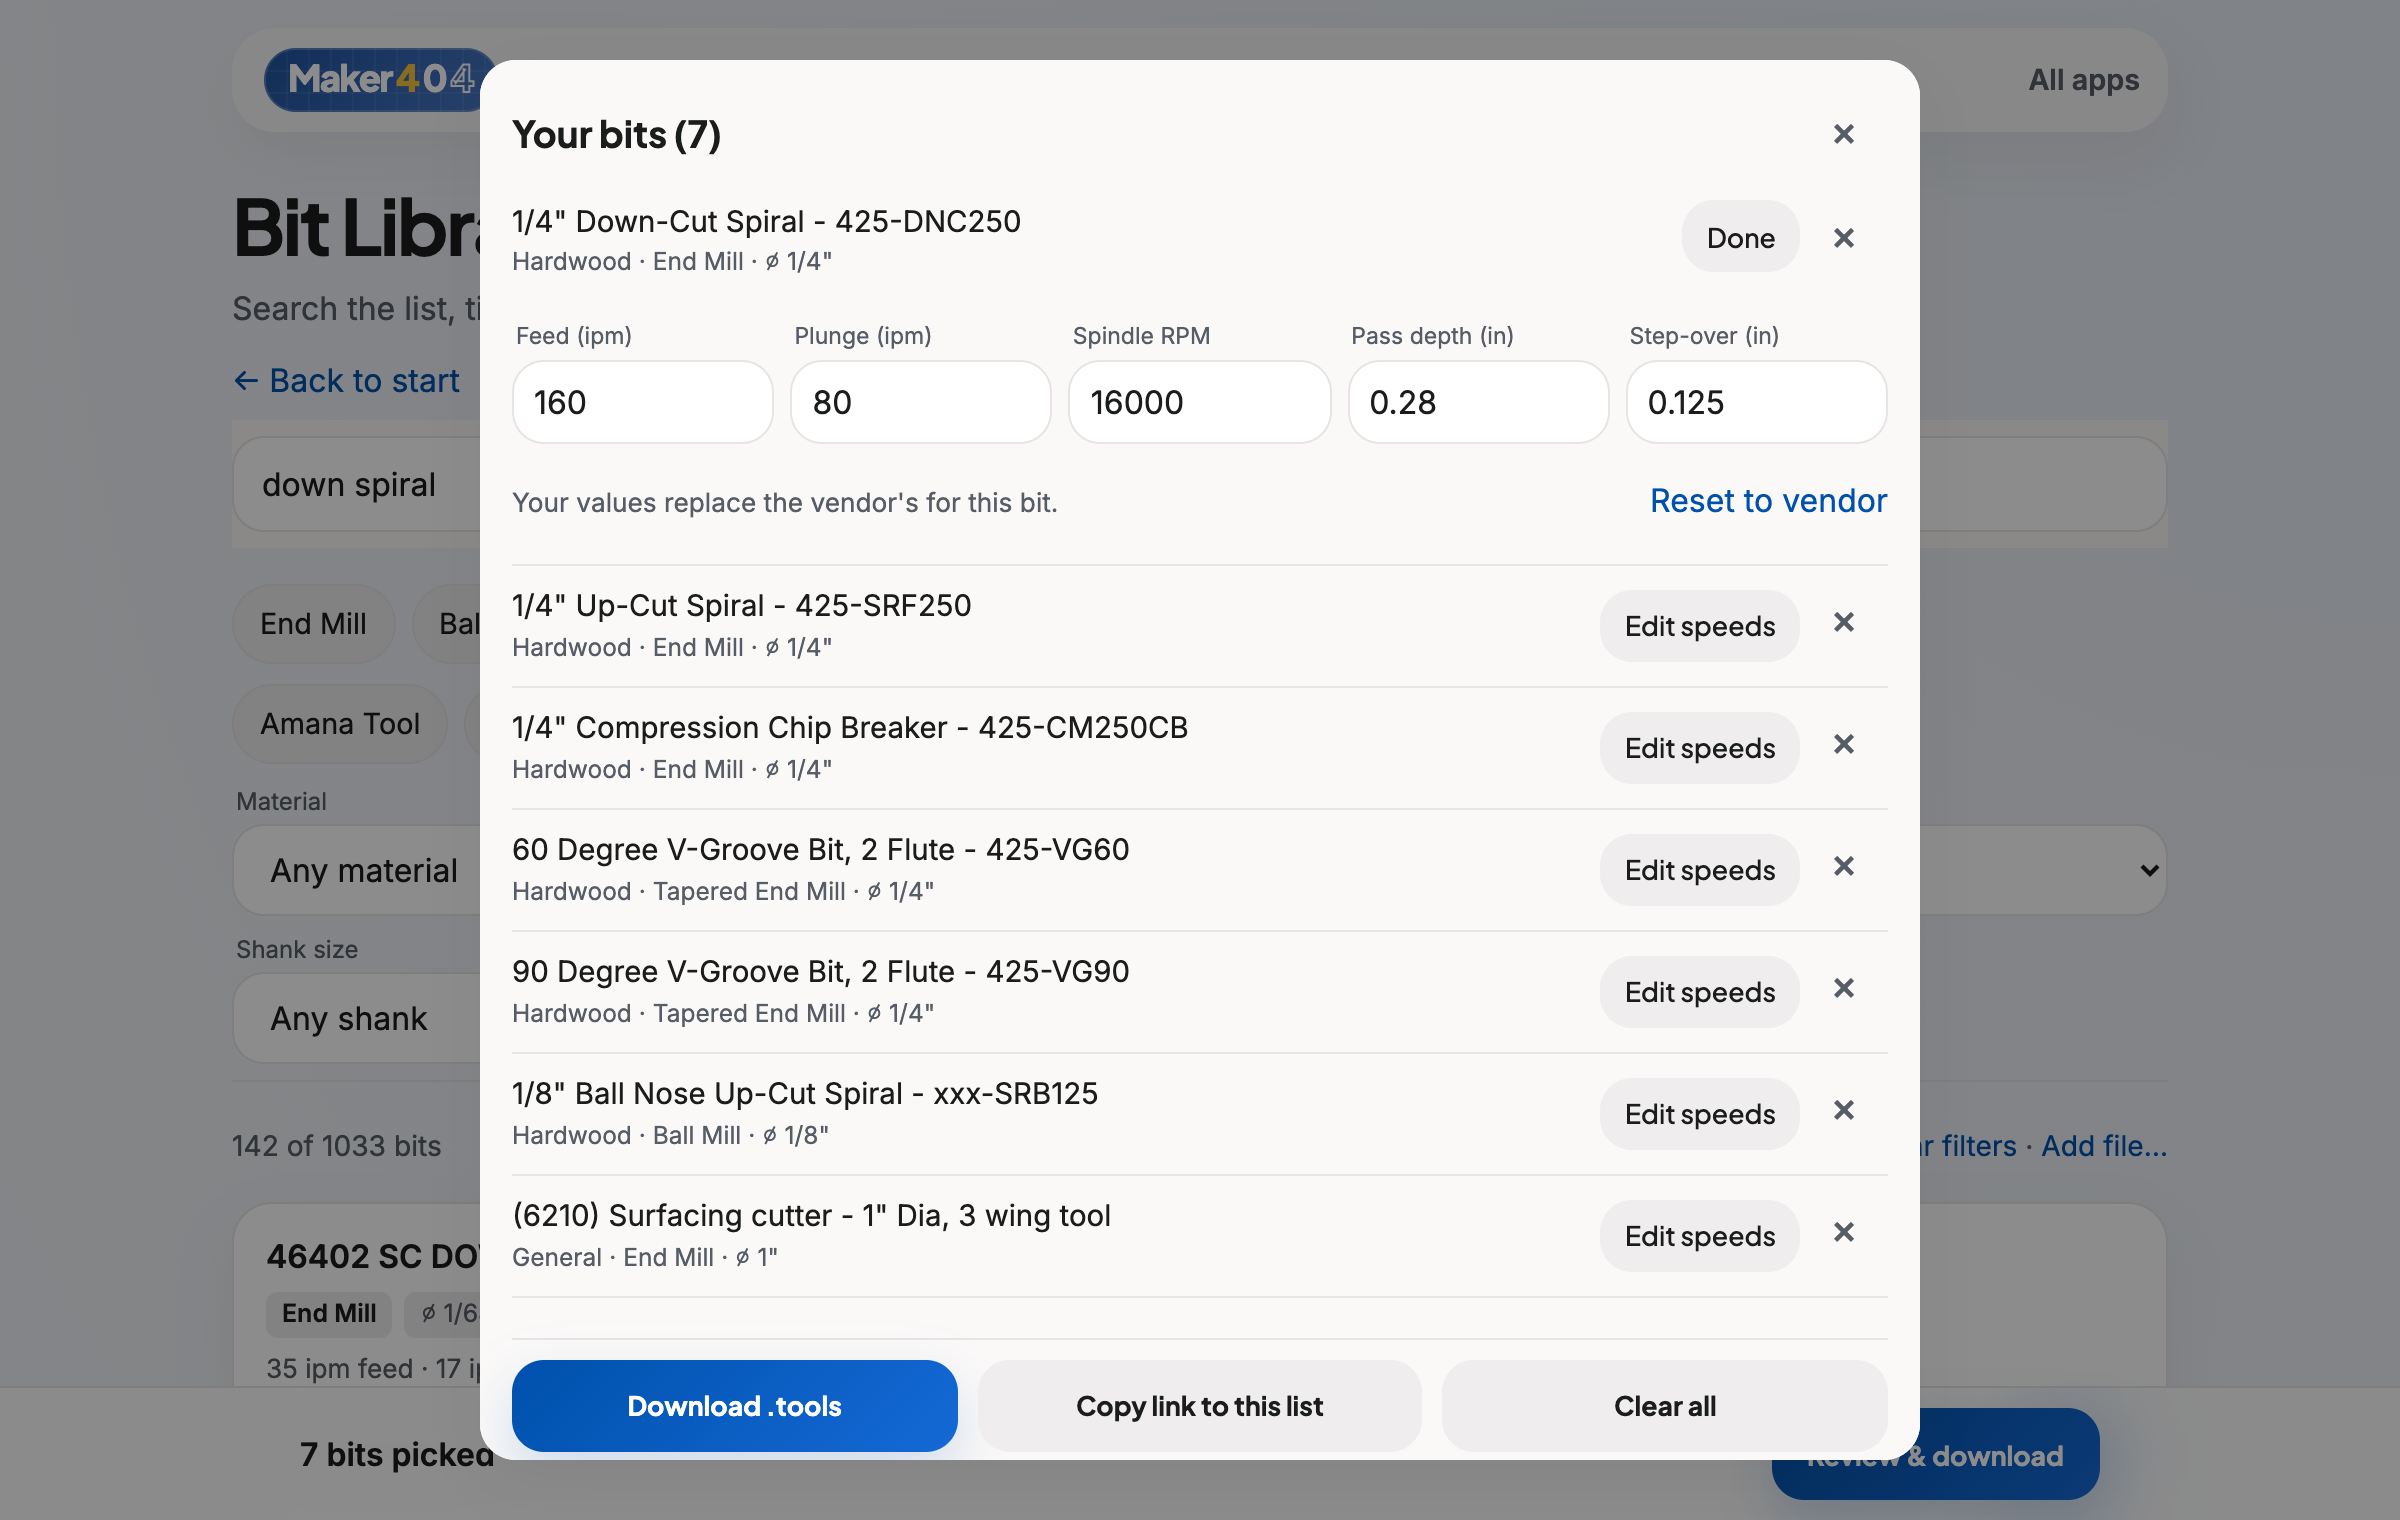
When you are done picking, the review panel lists your bits. Press Edit speeds on any of them and you can change the feed, plunge rate, spindle RPM, pass depth, and step-over. There is a Reset to vendor button if you want to go back to the original numbers.
This matters for a classroom. Vendor numbers are written for a general machine. A hobby router or an older school CNC may need slower, safer values, and you can set those once for every student.
Options that save time
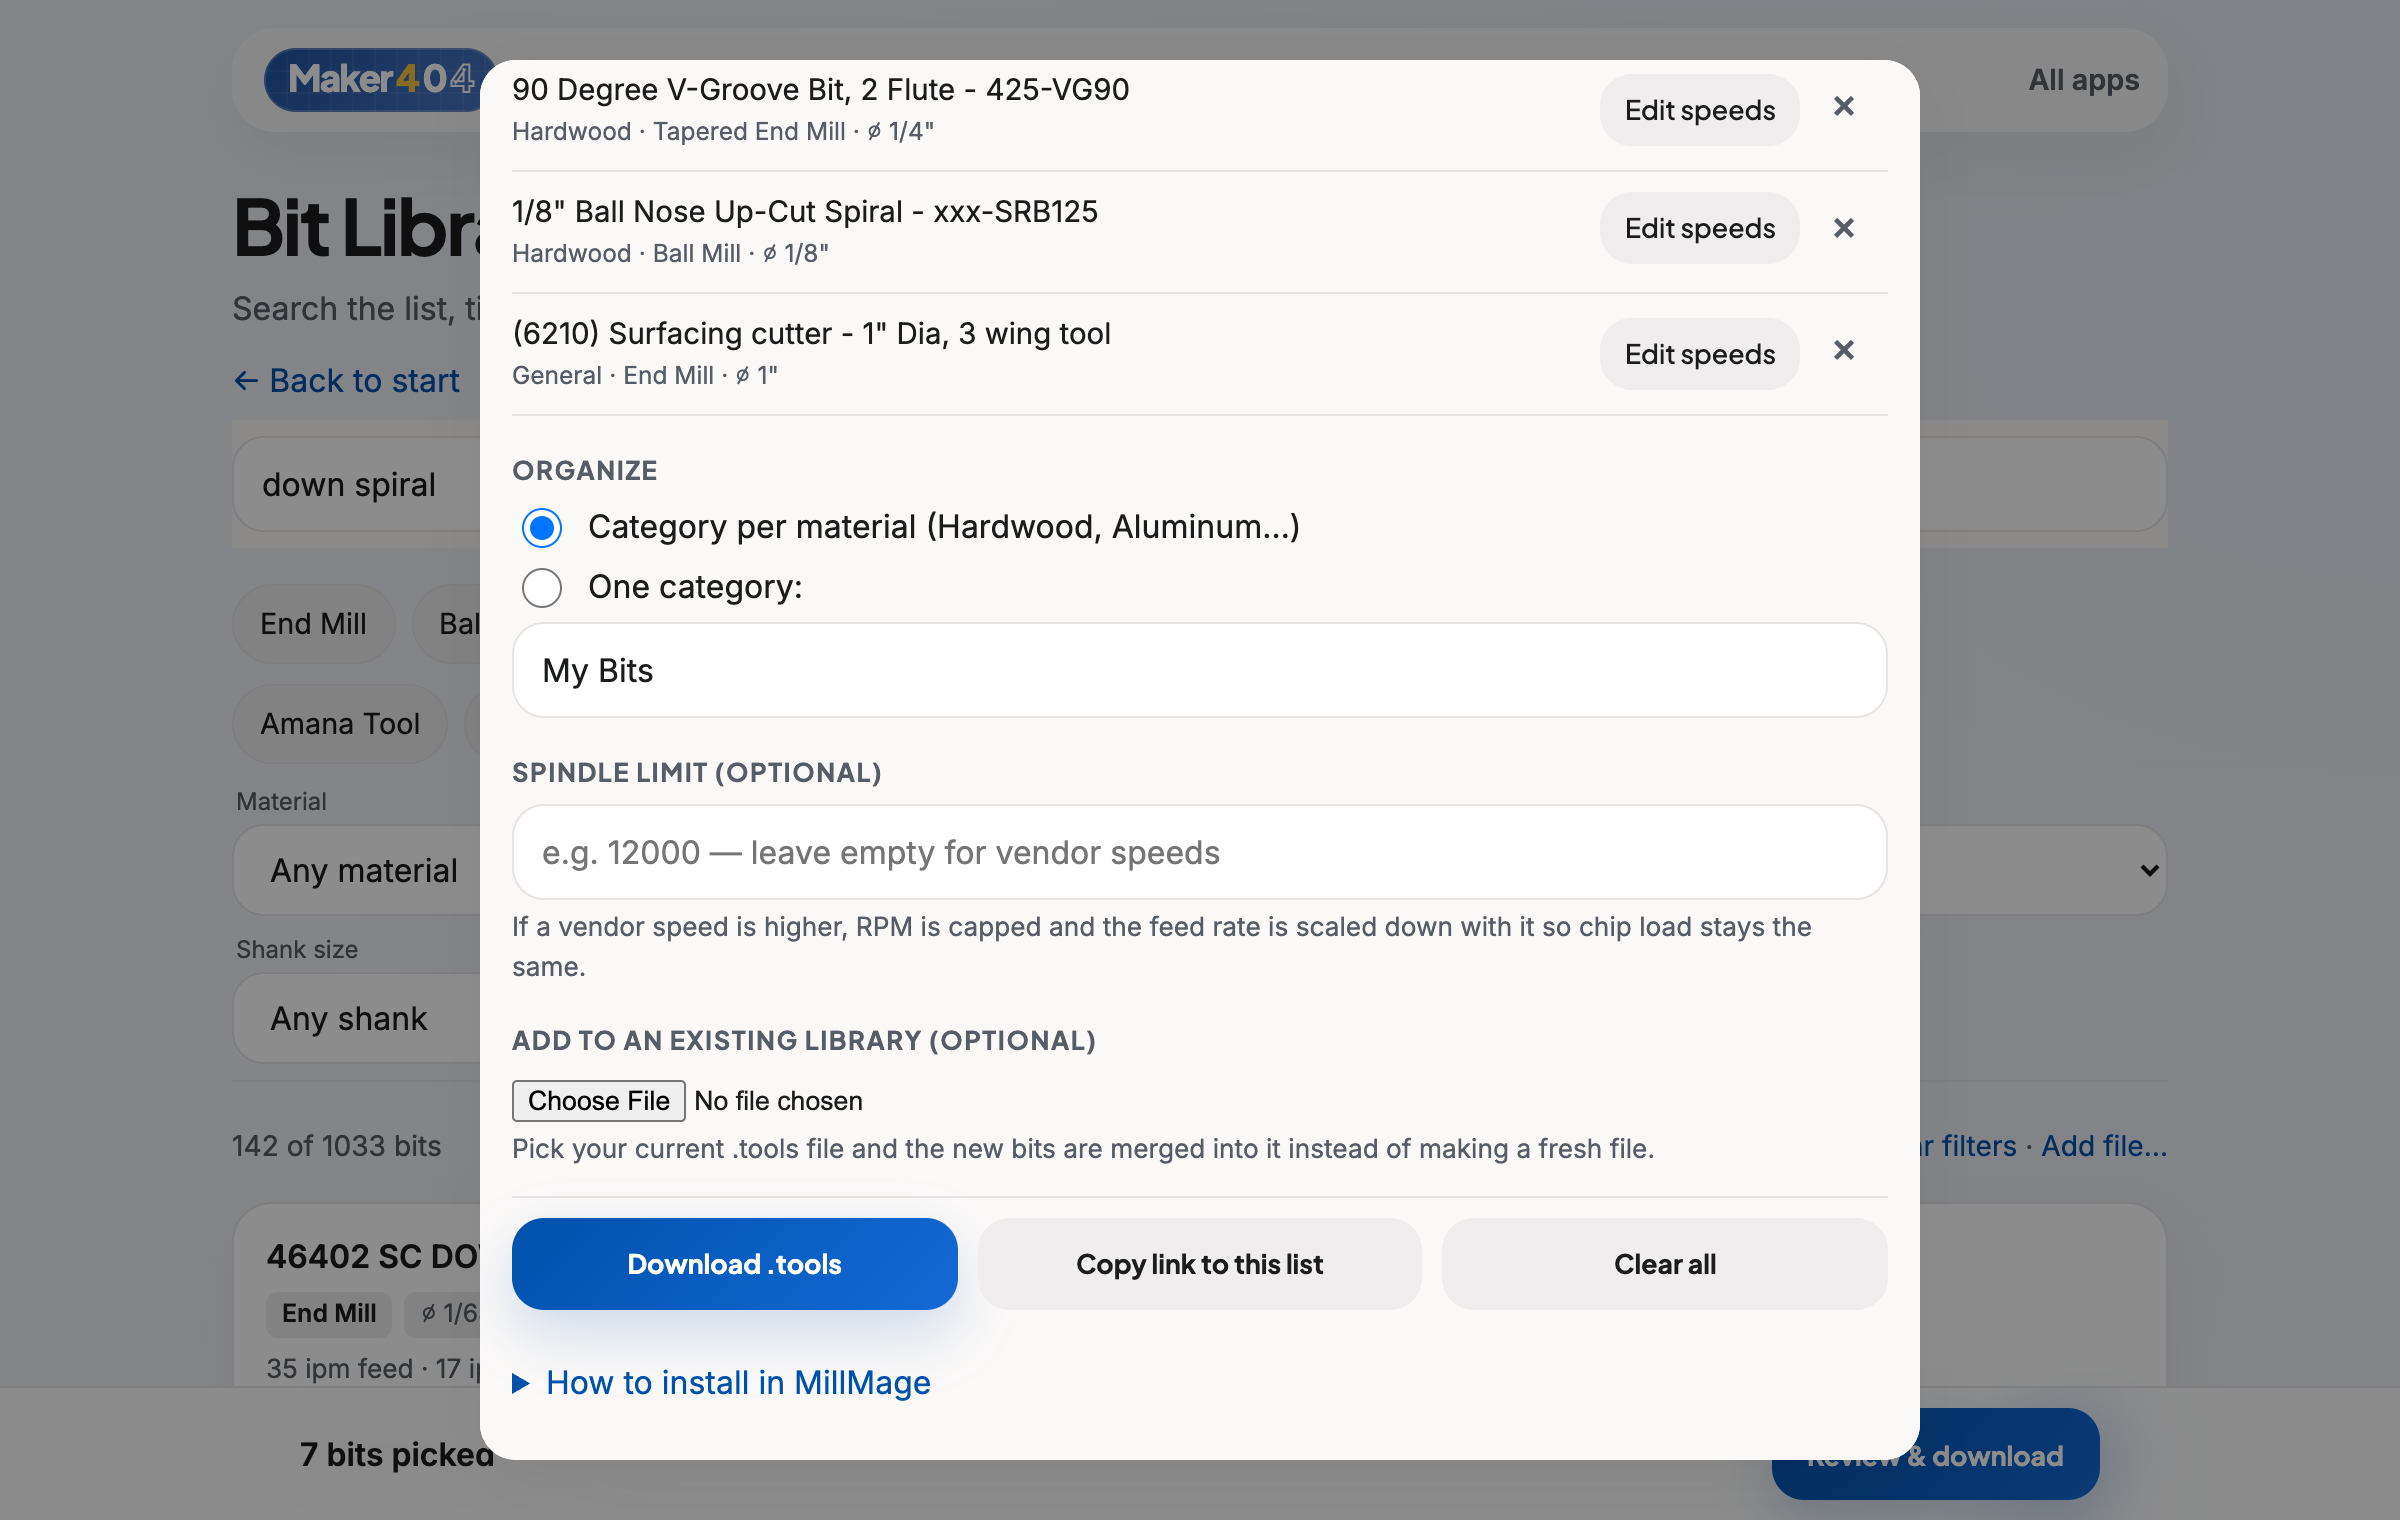
- Organize by material or one category. Sort bits into categories like Hardwood and Aluminum, or put everything in one folder with your own name.
- Spindle limit. If your spindle tops out at 12,000 RPM, enter that. Any vendor speed above it is capped, and the feed rate is scaled down with it so the chip load stays the same.
- Add to an existing library. Choose your current
.toolsfile and the new bits are merged into it. This is the feature I will use most at school when we buy new bits. - Copy link to this list. You get a link to your picks, which should make it easy to share a starter set with another teacher or your students.
How to install the file in MillMage
- Save the downloaded
.toolsfile intoDocuments/MillMage/ToolLibrarieson your computer. - In MillMage, open the Tool Library and choose your file, or restart MillMage.
- Spot-check a few bits against the cutter in your hand.
Your files stay on your device
Everything runs in your browser tab. Files you add are read and converted on your own computer, and nothing is uploaded or stored on a server. There are no accounts and no tracking. Your picks are remembered only in that browser. For a school setting, that was a requirement for me.
What to know before you use it
- Feeds and speeds are starting points. They come from the vendors’ published libraries and are not tuned for your machine. Test in scrap first, especially on a classroom CNC.
- Conversion is automatic. Spot-check anything important before you cut.
- It is not official. Bit Library Builder is not affiliated with or endorsed by LightBurn, MillMage, or any of the bit vendors. It is a tool I made for my own use that I am sharing.
If a bit imports wrong or you want another vendor added, there is a feedback link at the bottom of the tool, or you can reach me on the contact page.
Frequently asked questions
Does MillMage work with an older CNC?
I am still working this out for our school machine. I have run it on my Onefinity, and I will write up the older shop CNC once we have tested it. Check MillMage’s own documentation for supported controllers before you plan a classroom around it.
Do my students need to know LightBurn first?
No. But if they already use it, I expect a shorter on-ramp, which is the whole reason I want to try this.
Can I use bits that are not on the list?
Yes. You can upload your own library from Fusion 360, Vectric, or Carbide Create, or add a vendor file you download yourself.
Is Bit Library Builder free?
Yes. It is free, with no account.
What’s next
I will keep building my MillMage lessons this fall and start teaching them in the second trimester. When students have tried it, I will share what transferred from LightBurn, what did not, and how long the first project took. In the meantime, you can try Bit Library Builder and browse more free classroom tools on the Maker404 apps page.